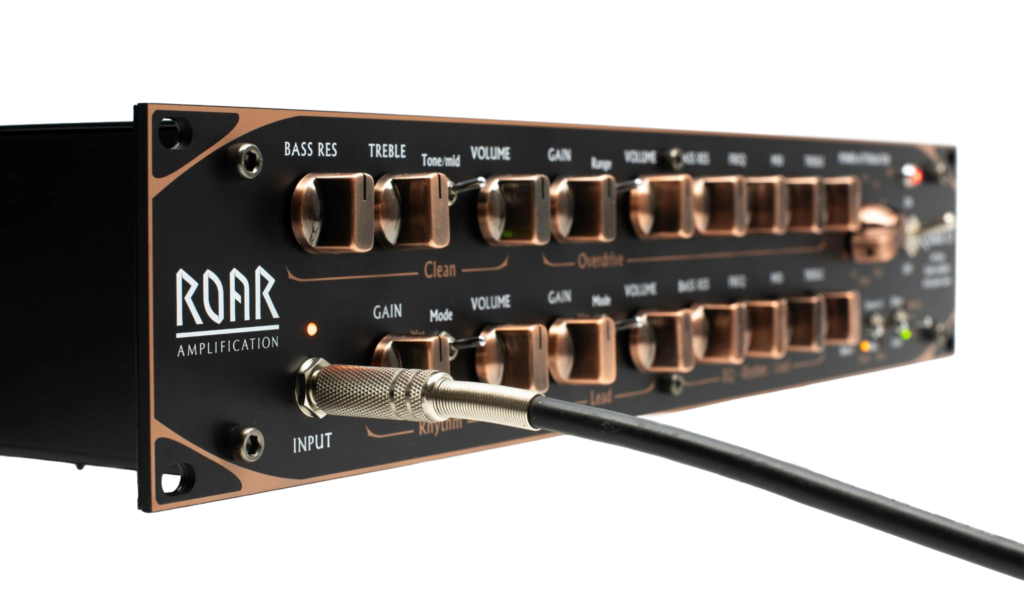
GAIN: Sets preamp gain level, which depends on the “Range” switch.
VOLUME: With the Range switch set to “Clean”, the volume control will typically be set higher (> 14:00) to push the power amp. Setting the Range switch to “Low” and “High” and Volume around 12:00, the power amp starts to compress “fizzy” treble spikes from the preamp distortion for a more raw sound. Beyond 13:00, the power amp will go into more saturated overdrive/distortion and dampening the treble response for a raw vintage sound.
Range switch:
High: Lower Gain settings provide smooth overdrive with great string definition for open chords and single notes. Higher gain settings enter the classic rock / heavy metal domain like the classic amps from the 80’s. With moderate low-cut before the gain stages, the bass response is defined, but not as chunky as the “Rhythm” channel.
Low: Brown overdrive. Classic tube overdrive with less low-cut before the gain stages. Low gain overdrive sounds become more wet as the gain is turned up with a more brown tone. At lower settings, you get a dark and dirty clean tone, which works great for blues and “clean leads”.
Clean: Low gain for all clean to dirty clean tones with more treble. This setting turns the preamp into a dirty clean channel with a very compressed character. The tubey compression is ideal to bring a “clean” guitar to the front of the mix.
BASS RESonance: Adds open and dynamic bass around the natural resonance frequency of a guitar speaker at around 100 Hz. The tightness of the bass content of distortion guitars can be better controlled compared to tone stack bass controls. High settings of Bass resonance, and typically mid and treble controls to balance the sound, will give a loose and open bass response. Lower settings of bass resonance and EQ controls will tighten up the bass response, which is often preffered for rock and metal guitars. Note that the bass level will greatly depend on your speaker cabinet.

The graph shows the frequency response for different settings of the BASS RES control.
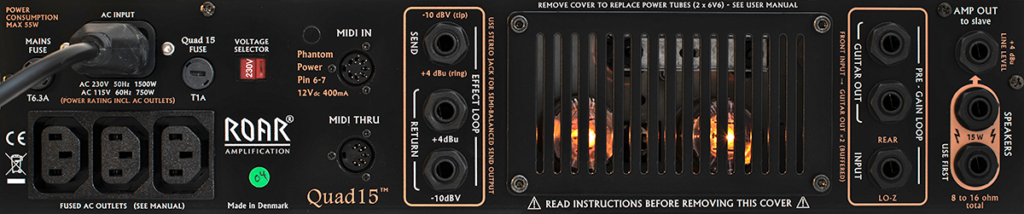
The amp is measured from the ”Return +4dB” input to the ”Speaker” output with no speaker connected (internal speaker load emulation only). The other EQ controls do not affect the frequency response from the ”Return” inputs.
FREQ: Adjust the center frequency for the “MID” control.
- MIN position: Lots of upper mids. Raw and crunchy. Less chunky/boomy bass
- MID position: Chunky bass and body with more upper mids for a raw sound
- MAX position: Lots of body and lower upper mids. Turn up the treble to add presence or lower the Bass resonance control if necessary. In a mix, this setting gives a more “leaned back” sound to give space to other instruments

The graph shows the frequency response for different settings of the BASS RES control.
The amp is measured from the ”Return +4dB” input to the ”Speaker” output with no speaker connected (internal speaker load emulation only). The other EQ controls do not affect the frequency response from the ”Return” inputs.
TREBLE: Classic tone stack treble control with wide adjustment range. The frequency content depends on the FREQ setting. Higher FREQ setting will shift the frequency range for the treble control higher.
GAIN (Rhythm): At 9:00 the gain level is suitable for open chord styles with great tubey overdrive and string definition. At 12:00, the gain level enters the distortion territory giving rhythm guitars great chunk at 13:00 to 15:00. Full gain setting will satisfy for soloing for many guitarists.
GAIN (Lead): Similar to the Rhythm channel, but with added treble/mid boost to keep string definition even at the highest gain setting, ideal for solos.
VOLUME: At ~13:00, the power amp starts to compress the “fizzy” treble spikes from the preamp distortion for a more raw sound. Beyond 13:00, the power amp will overdrive the bass content too, which adds more defined mids to chunky guitar tones. At around 14:00 to 15:00, the power amp will distort more and smash the bass response, making the overall tone much more mid focused. Try out low preamp gain levels and high volume levels for a different kind of raw distortion character.
Mode switch:
Wet: Hi-gain with wet bass. At lower gain settings, the amp sounds very classic with a more “wet” bass response. This setting works well with single coil pickups and open chord work. Higher gain settings give a thick saturated distortion (Fuzz). Single notes will be bold and up front in the mix. Also suitable to thicken up guitars that lack bass. Roll of the Bass resonance control to compensate if needed.
Tight: Hi-gain with more low-cut for a tight bass response similar to “Treble booster pedals”. Extended treble response from the all tube circuitry. At lower gain settings, darker humbuckers benefit from added clarity, while higher gain settings add chunk and definition to rock and metal rhythm guitars. The Lead channel will provide great string definition even at the highest gain settings for solos.
Diode: Hi-gain with tighter bass response and attenuated fizz. Adds clipping diodes to the circuit similar to OD/dist pedals for an even tighter bass response with enhanced mids and attenuated fizz for high gain settings. Low tuned guitars often benefit from this setting. At lower gain settings, the amp is darker and goes into smooth overdrive with lots of string definition suitable for rock and blues, while you can turn up the bass resonance to restore bass and body to your sound.
BASS RESonance: Adds open and dynamic bass around the natural resonance frequency of a guitar speaker at around 100 Hz. The tightness of the bass content of distortion guitars can be better controlled compared to tone stack bass controls. High settings of Bass resonance, and typically mid and treble controls to balance the sound, will give a loose and open bass response. Lower settings of bass resonance and EQ controls will tighten up the bass response, which is often preffered for rock and metal guitars. Note that the bass level will greatly depend on your speaker cabinet.
The graph shows the frequency response for different settings of the BASS RES control.
The amp is measured from the ”Return +4dB” input to the ”Speaker” output with no speaker connected (internal speaker load emulation only). The other EQ controls do not affect the frequency response from the ”Return” inputs.
FREQ: Adjust the center frequency for the “MID” control.
- MIN position: Lots of upper mids. Raw and crunchy. Less chunky/boomy bass
- MID position: Chunky bass and body with more upper mids for a raw sound
- MAX position: Lots of body and lower upper mids. Turn up the treble to add presence or lower the Bass resonance control if necessary. In a mix, this setting gives a more “leaned back” sound to give space to other instruments
The graph shows the frequency response for different settings of the BASS RES control.
The amp is measured from the ”Return +4dB” input to the ”Speaker” output with no speaker connected (internal speaker load emulation only). The other EQ controls do not affect the frequency response from the ”Return” inputs.
TREBLE: Classic tone stack treble control with wide adjustment range. The frequency content depends on the FREQ setting. Higher FREQ setting will shift the frequency range for the treble control higher.